Instructions for Connecting to Jupyter Server
Background
Jupyter notebooks are a way to share live documents including code, narritive text and visualizations. Jupyter front end runs on a browser which is connected to a server. The server can be local or remote. These instruction explain how to connect to a remote server. Instructions for both Windows and Linux are included.
Linux
Open a terminal and type,
ssh -L 8888:localhost:8888 username@ip-address
.. where username and the ip-address have been supplied to you.
This will open up an SSH tunnel to the server on local port 8888.
You will be asked for a password.
Type the password given to you.
Now open a browser and paste in the URL supplied to you. It will look something like this.
http://localhost:8888/?token=ba7c665..............
You should now see a Jupyter page.
Somply double click on the desired Jupyter notebook file.
Windows
This technique requires the use of Putty which is widely available for free download.
Execute Putty and fill in the Host Name (or IP address) block as shown below. Ignore the other entries.

Now click the + sign on the SSH line in the left pane (near the bottom). You should now see the image below.

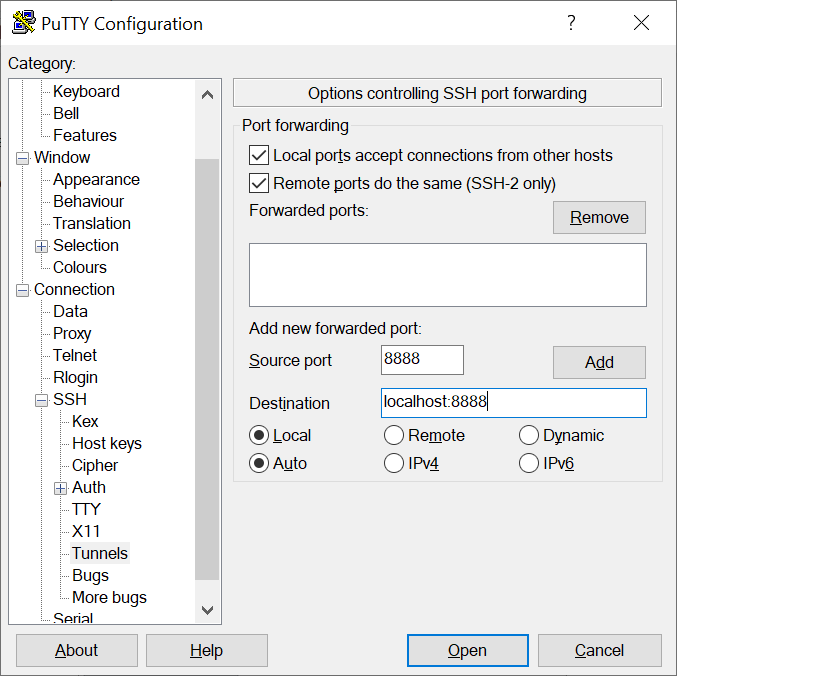
Now clock on the Tunnels line on the lower left. You should now see the image below.

Click the two check boxes near the top and fill in the Source port and Destination as shown belown.
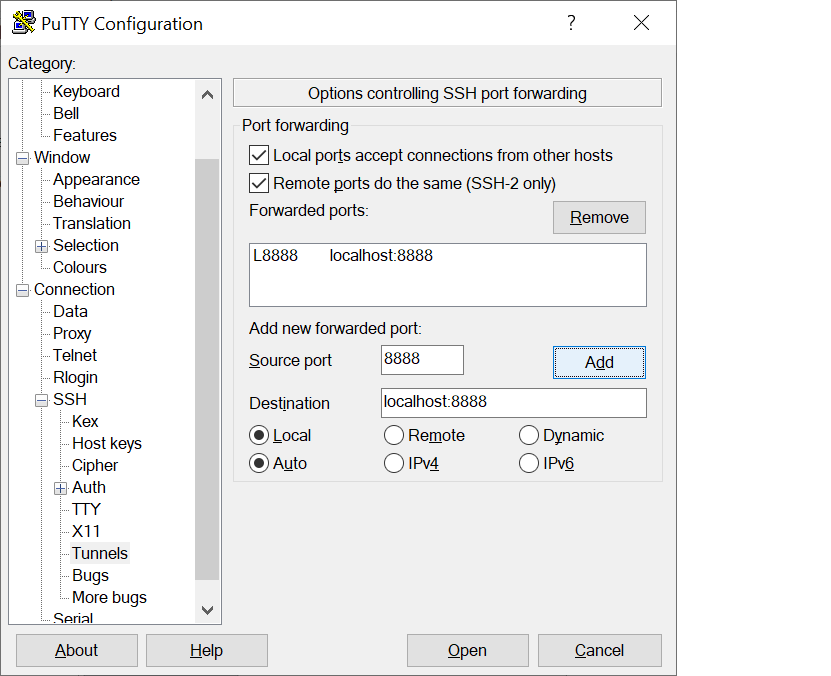
Now click the Add button (next to the Source Port on the far right). It should now look like the image below.
Now simply click on Open at the bottom.
You should now be asked for a username. Type,
Supplied-Username
You will then be asked for a password. Type,
Supplied-Password
Now open a browser and paste in the URL supplied to you. It will look something like this.
http://localhost:8888/?token=ba7c665..............
You should now see a Jupyter page.
Somply double click on the desired Jupyter notebook file.